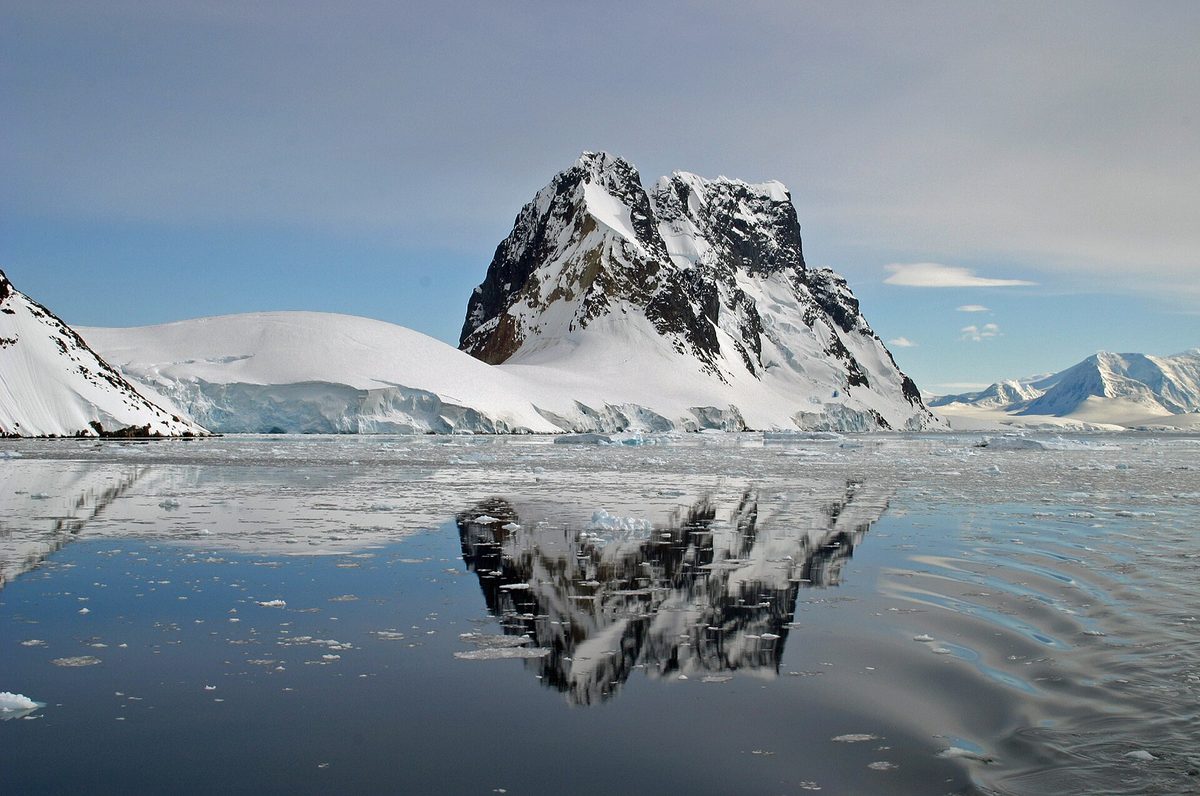
I still remember the first frame I ever shot in the far south. I was leaning over the pontoon of a Zodiac, fingers half-frozen, when a leopard seal slid up beside the boat and held my gaze for one impossible second. I missed the focus. I have spent every voyage since trying to earn that moment back, and along the way I have learned that planning a dedicated antarctica photography trip is the single best decision a serious photographer can make. You are not squeezing a hobby into a cruise; you are building an entire expedition around light, ice, and wildlife, with the time and the priority access to actually do them justice.
This guide is the one I wish someone had handed me before I burned a season figuring it out the hard way. I will walk you through choosing a photo-focused voyage or workshop, exactly what gear to bring (and what to leave home), how to shoot from a heaving Zodiac and on slippery shore landings, how to nail exposure on blinding snow and luminous ice, the wildlife technique that separates keepers from blurry near-misses, the best months for photographers, what it all costs, the truth about drones, and who this kind of trip really suits. Everything here is hard-won and practical. Let us get you ready.
Why dedicate a whole trip to photography?
Antarctica is, without exaggeration, the most photogenic place I have ever pointed a camera. The light in the long polar summer behaves like nowhere else, the wildlife is fearless and close, and the scale of the ice rearranges your sense of what a landscape can be. But a standard expedition cruise, wonderful as it is, runs on a schedule built for everyone. Landings are timed, Zodiac rotations are shared, and the best light often arrives when the day’s program says it is time for dinner.
A dedicated photography voyage flips those priorities. The whole rhythm of the trip bends toward the camera: earlier launches, longer dwell time at the good spots, slower Zodiac cruises so you can work a scene, and an expedition team that understands why you want to sit quietly with a single iceberg for forty minutes. If photography is the reason you are going south, this focus is worth a great deal. For the bigger picture of how different trip styles suit different travellers, our hub on Antarctica for every traveller compares the options side by side, and it is a sensible place to start before you commit.
If you are not sure you want an entire photo-centric voyage and would rather understand the craft of shooting the continent in general, our companion guide to Antarctica photography covers the fundamentals of capturing the place on any kind of cruise. Think of that piece as the wide-angle view and this one as the dedicated, gear-up, photographer-first deep dive.
Choosing a photo-focused voyage or workshop
Here is the most important thing to understand: not every cruise that mentions photography is built for photographers. The market is large, with something on the order of ninety-plus dedicated photography departures listed across the 2026 and 2027 seasons, typically running anywhere from about eight days to a month, and starting somewhere around eight thousand US dollars per person and climbing steeply from there. Within that crowd, the experiences vary enormously, so let me give you a way to sort them.
The three tiers of photo voyage
Broadly, photographically minded trips fall into three bands, and knowing which you want saves you money and disappointment.
- A standard expedition with a photographer aboard. Many ships now include a professional photographer on the expedition team at no extra cost, offering informal guidance, deck-side tips, and the odd lecture. This is a brilliant entry point if photography is important to you but not the only reason you are going. You sail a normal itinerary and lean on the expert when you want to.
- A dedicated photography program layered onto a voyage. Here the operator builds a structured photo program into an otherwise standard sailing: workshops, image reviews, sometimes priority on the first Zodiacs out. As examples (and only examples, so confirm current details), Intrepid has run an onboard Photography Workshop Program in partnership with Sony that offers loaner gear to try; Polar Latitudes has offered an Immersive Photography Program aimed at intermediate and advanced shooters, with a dedicated instructor and priority on the earliest landing craft; and Aurora Expeditions has run an “Antarctica: Through the Lens” voyage featuring professional guest instructors.
- A full small-group photo expedition. The most committed option: a tight group, often led by a name photographer, on a small ship where the entire itinerary is shaped around shooting. Slow cruises, dawn launches, long dwell times, and a guide who will stand in the spray to help you dial in a setting. These cost the most and fill the fastest.
Whichever tier you choose, the underlying vessel matters enormously. A genuine expedition ship with abundant open deck space, a generous Zodiac fleet, and flexible landing times will serve you far better than a big, glassed-in cruise liner. Our guides to Antarctica cruises and the various Antarctica cruise itineraries will help you separate true expedition vessels from repurposed liners, and compare the classic Peninsula run against longer voyages that add South Georgia and the Falklands.
Questions to ask before you book
When I vet a photography voyage, I ask the operator a specific set of questions, and I urge you to do the same.
- How many guests does the ship carry, and how many can land at once? Smaller is better; under the guidelines of IAATO (the International Association of Antarctica Tour Operators), no more than 100 people may be ashore at any one site at a time, so a smaller ship means more time on the ice.
- Is there a dedicated photo instructor, and what is the ratio of photographers to guide?
- Do photographers get priority on the first Zodiacs out, when the light is best and the wildlife is calm?
- How flexible are landing times? Will the captain chase good light or rigidly follow a clock?
- How much open deck space is there, and are there dedicated Zodiac cruises (not just shuttles to shore) for shooting from the water?
- What is the realistic group size, and what level is it pitched at, beginner, intermediate, or advanced?
What gear to bring on an antarctica photography trip
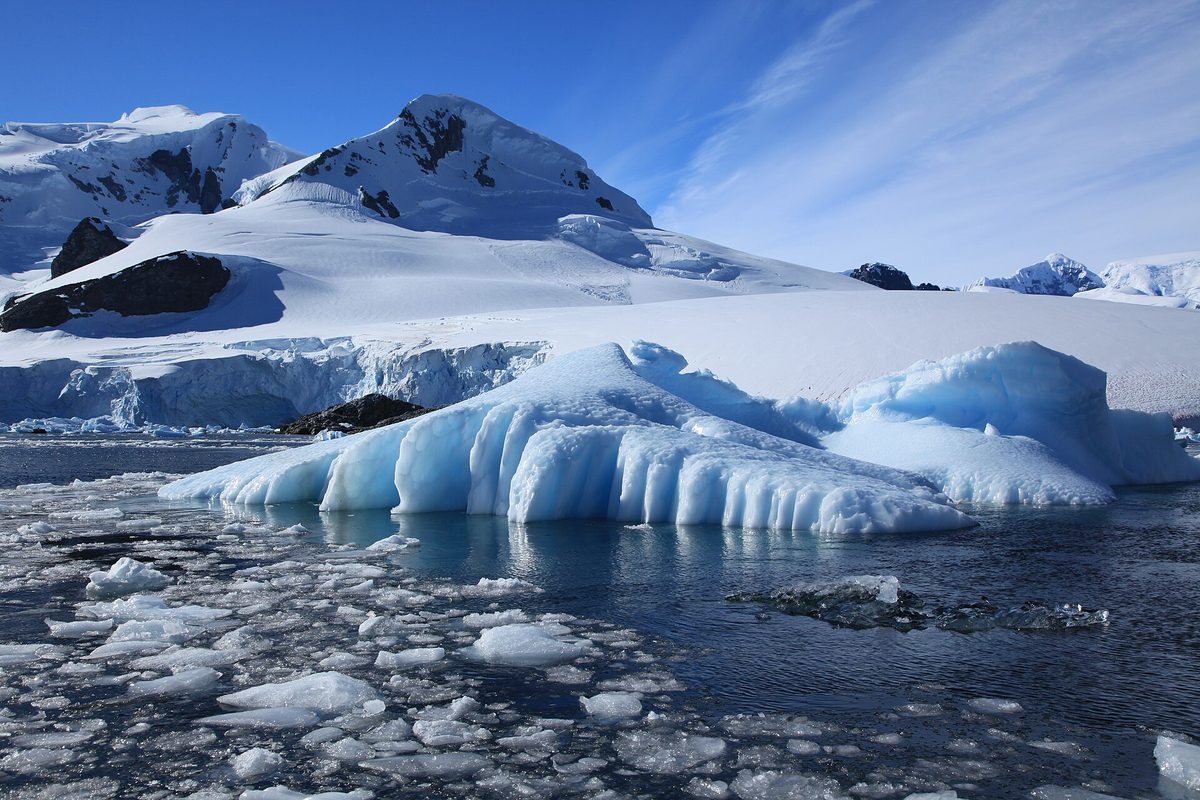
This is the section people email me about most, so I will be opinionated and specific. The cold, the spray, and the sheer remoteness mean your kit choices carry consequences. You cannot pop to a shop for a forgotten cable at the bottom of the world. Pack deliberately.
Cameras and lenses
Bring a weather-sealed camera body if you possibly can, and ideally a second body as backup, because a failure mid-voyage is otherwise trip-ending for your photography. The two-lens strategy that almost never lets me down is a telephoto for wildlife and a wide-angle for landscapes:
- A telephoto zoom in the region of 100–400mm (or longer) is your wildlife workhorse, letting you frame a penguin’s expression or a distant whale blow without crowding the animal. A teleconverter can extend your reach for seabirds.
- A wide-angle (think roughly 16–35mm) for the icebergs, the channels, and those enormous skies. The landscapes here demand width.
- A mid-range zoom (around 24–70mm) is a useful one-lens-on-the-body option for Zodiac cruising, where swapping glass invites spray onto your sensor.
Resist the urge to bring every lens you own. Changing lenses in blowing snow or salt spray is how sensors get ruined. I generally keep a telephoto on one body and a wide on another, and I rarely swap in the field.
Power, cards, and the cold-battery problem
If you remember one thing from this guide, make it this: the cold drains batteries fast. Frighteningly fast. Bring far more spare batteries than you think you need, double what you would pack for a temperate trip is not unreasonable, and keep the spares warm in an inside pocket close to your body. A battery that seems dead in the cold will often revive once it warms up, so cycle them. Likewise bring plenty of fast, high-capacity memory cards; you will shoot more frames than you imagine, and you do not want to be deleting keepers to make room.
Protection, support, and the small essentials
The Antarctic environment is brutal on gear, and a few inexpensive items will save your trip:
- Dry bags and rain covers. Zodiac spray is constant and salty. A dry bag for transit and a rain cover for the camera while shooting are non-negotiable.
- Lens cloths, and lots of them. Spray, snow, and your own breath fog will smear your front element repeatedly. Microfibre cloths are gold; bring a stack.
- A beanbag or monopod. Tripods are awkward on a moving Zodiac and often impractical on landings, but a beanbag steadies a long lens on the boat’s pontoon, and a monopod helps ashore.
- Warm gloves you can shoot in. Liner gloves under mittens let you operate dials without exposing bare skin. Cold fingers end shooting sessions faster than dead batteries.
- A sturdy, waterproof camera backpack for safe transport ashore and on the Zodiacs.
For everything else you will need on a polar voyage, from boots to base layers, lean on our detailed what to pack for Antarctica guide. Dressing correctly is not separate from photography; warm, dry hands and a comfortable body are what let you keep shooting when the light turns magical.
Shooting from a Zodiac and ashore
Most of your best frames will come from two settings: the Zodiac inflatable cruising among the ice, and on foot during shore landings. Each demands a different approach.
From the Zodiac
The Zodiac is a photographer’s dream and a logistical headache at once. You are low to the water, eye-level with seals on floes and breaching whales, gliding silently past sculpted bergs. But you are also on an unstable, often spray-soaked platform with no room for a tripod. My approach: keep one camera with a versatile lens out and ready, set a fast shutter speed to counter the boat’s motion, raise your ISO without fear (a sharp slightly noisy frame beats a clean blurry one), and brace your elbows or rest the lens on a beanbag on the pontoon. Shoot in bursts. And always, always keep a lens cloth wedged somewhere reachable. Our dedicated guide to the Antarctica Zodiac cruise goes deeper on what these outings are like and how to make the most of them.
On shore landings
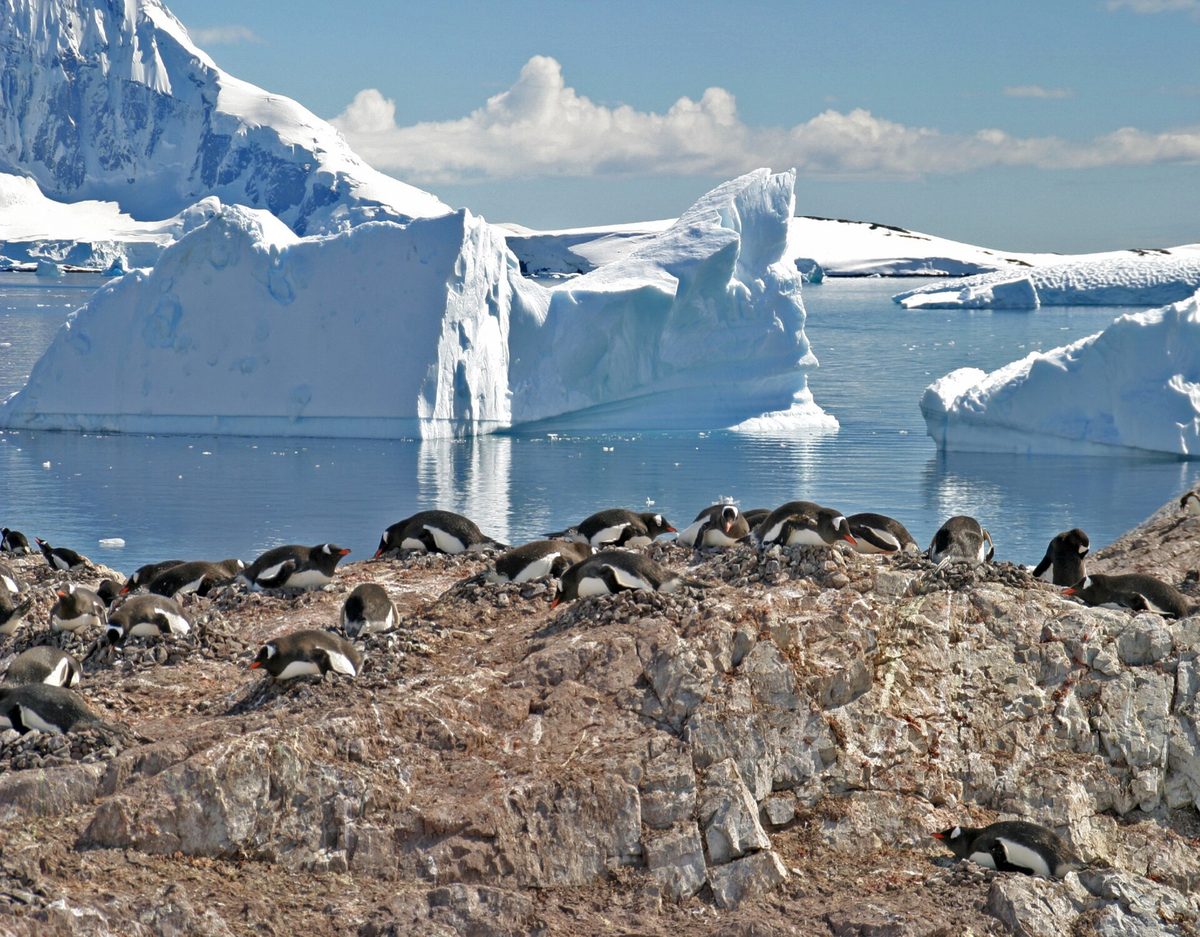
Ashore, you trade stability for the gift of time and steadier feet. This is where you can slow down, work compositions deliberately, and get low to put a penguin at eye level against the ice. Watch your footing on slick rock and guano, respect the wildlife-distance rules the expedition team sets (typically around five metres from most animals, more for fur seals), and never block an animal’s path to or from the sea. A penguin highway is theirs, not yours. Get down low, be patient, and let the scene come to you. The colonies will reward a photographer who waits.
Mastering light and exposure on snow and ice
Snow and ice are where most people’s Antarctica photos go wrong, and where a little knowledge transforms your results overnight. The problem is simple: your camera’s meter assumes the world averages out to a mid-grey, so when it sees a frame full of bright white snow, it dutifully darkens the exposure to make that white look grey. The result is dull, dingy, underexposed snow.
Expose for the snow
The fix is to deliberately overexpose relative to what the meter wants, dialling in positive exposure compensation (often somewhere around +1 to +2 stops, depending on the scene) to keep your whites genuinely white. Do not trust your eyes on the small rear screen in bright conditions; trust the histogram instead. You want the data pushed well to the right without clipping the highlights off the edge. Learn to read that histogram and check it often, especially as the light changes through the day. Many cameras also offer a highlight-warning “blinkies” display, which is invaluable for catching blown-out snow.
Shoot RAW, and mind the white balance
Always shoot in RAW. The dynamic range of a bright iceberg against dark water and shadowed ice is enormous, and RAW gives you the latitude to recover highlights and lift shadows in editing that a JPEG simply cannot. RAW also lets you correct white balance after the fact, which matters because snow picks up colour casts, cool blue in shade, warm gold at the edges of the day, and you will want control over that later.
Make the polar light work for you
Here is the gift the far south hands you: the long polar summer daylight stretches the soft, low-angle “golden hour” light into something that lingers for hours rather than minutes. In the deep season the sun barely sets, so the warm, raking light photographers chase can arrive late in the evening and again very early, when most passengers are asleep and you can have the deck or a Zodiac nearly to yourself. This is exactly why priority on the first boats out, and a flexible operator who will chase the light, matters so much. Plan to shoot at the edges of the day and rest in the flat midday glare.
Beware condensation
One hard-won warning: moving a cold camera into a warm cabin causes condensation to form on, and inside, the gear, which can fog lenses and, over time, harm electronics. Before you go inside, seal your camera in a zip-lock bag or your camera bag and let it warm up gradually before opening it. Reverse the logic going out: let gear acclimatise to the cold. Manage this and you avoid the maddening sight of a fogged lens just as a whale surfaces.
Wildlife photography technique
The wildlife is the headline act of any antarctica photography trip, and it is astonishingly approachable. The animals here largely have no instinctive fear of humans, which means encounters are close, calm, and frame-filling. But there is real craft to turning that access into great images. For a fuller picture of what you will encounter, our overview of Antarctica wildlife is a great primer.
Penguins and the value of patience
Penguins are the gateway subject, comical, characterful, and everywhere on the Peninsula and the islands. The trick is to get low, to eye level, and to wait for behaviour: a courtship display, a clumsy waddle across the ice, a chick begging for food. A fast shutter freezes the action; a slightly slower one can convey motion in a deliberate pan. Watch the background as carefully as the bird, a clean field of snow or a blue iceberg makes the subject sing. To learn the species you will meet and their rhythms, see our guide to Antarctica penguins.
Whales and the discipline of fast shutter speeds
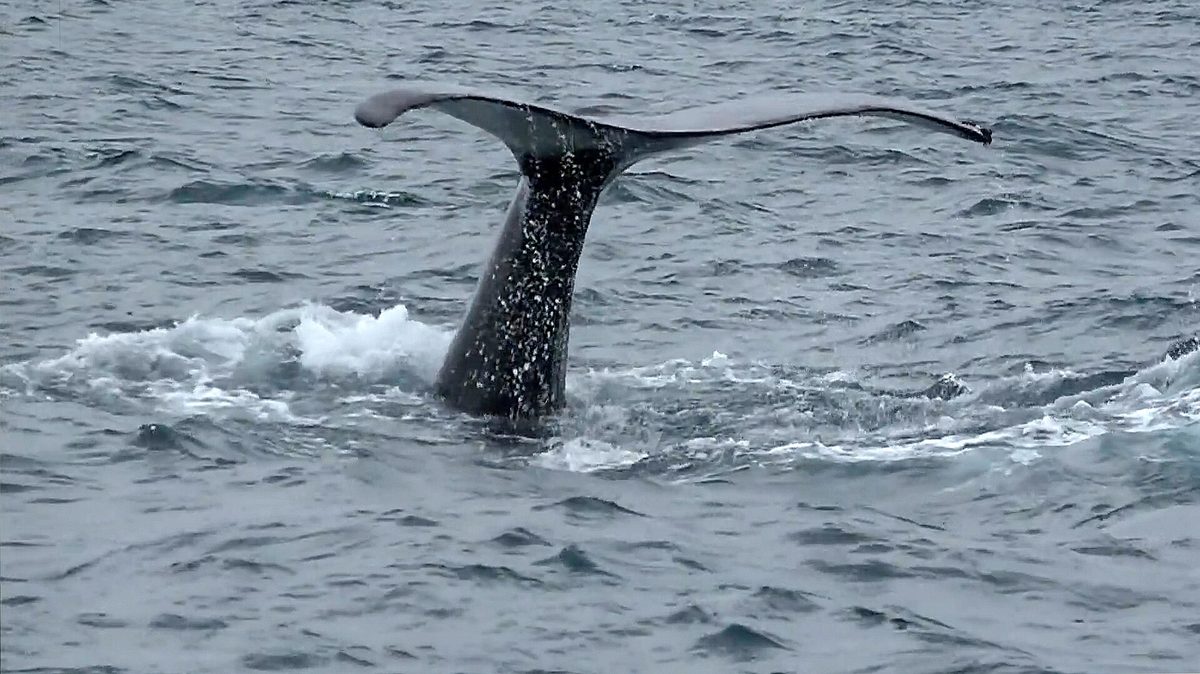
Few things quicken the pulse like a humpback surfacing beside the Zodiac. But whales are fast and unpredictable, so shutter speed is everything: a breach or a fluke-up dive happens in a heartbeat, and you need a fast shutter (well into the thousandths of a second for breaches) to freeze the spray and the motion. Pre-focus on where you expect the animal, shoot in bursts, and resist chimping at the screen between sequences, keep your eye in the viewfinder. Our guide to Antarctica whales explains the species and the best months to see them in action, which directly shapes when you should travel.
Seabirds and the patience of the long lens
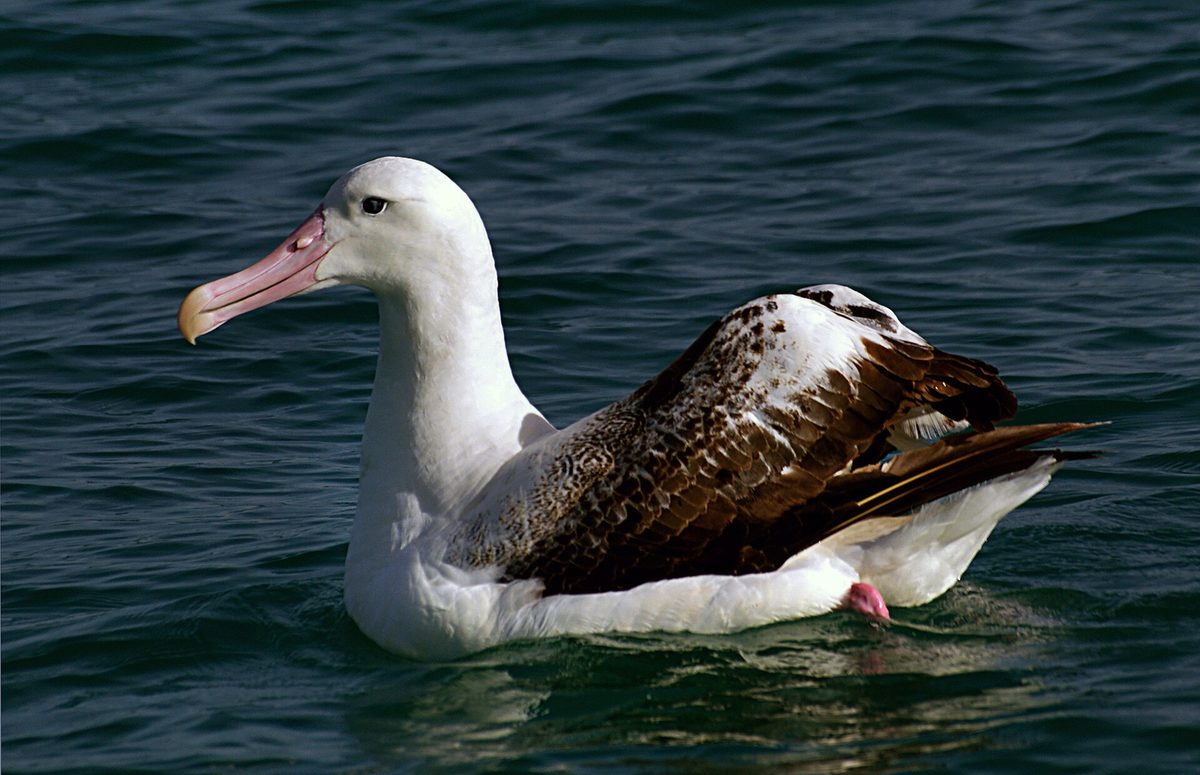
The Southern Ocean crossing is not dead time; it is a seabird spectacle. Albatrosses, petrels, and prions wheel behind the ship for hours, and capturing a wandering albatross banking on a three-metre wingspan is one of the great rewards of the voyage. This is panning practice: track the bird smoothly, use continuous autofocus, and a shutter speed fast enough to keep the eye sharp while the wings blur with motion if you choose. If birds are a priority for you, our dedicated Antarctica birdwatching guide pairs perfectly with this trip and will help you identify what you are framing.
Seals and the art of the environmental portrait
Crabeater, Weddell, leopard, and fur seals haul out on ice floes and beaches, often utterly relaxed. These are perfect subjects for an environmental portrait: a long lens to keep your distance and respect the wildlife rules, framed to show the animal in its luminous icy world. Watch for catchlights in the eye, and shoot from the Zodiac at the seal’s level for intimacy.
The best time for a photography trip
Timing is not a detail on a photography voyage, it is a creative decision, because each slice of the short Antarctic season offers a different palette and a different cast of subjects. The season runs roughly from late October to March. Here is how I think about it through a photographer’s eye, and our full best time to visit Antarctica guide expands on every trade-off.
| Period | What it offers photographers | Light & conditions |
|---|---|---|
| November | Pristine, untrodden snow and towering icebergs; penguins courting and building nests | Crisp, soft light; the cleanest white landscapes of the season |
| December–January | Peak activity: penguin chicks hatching, colonies bustling, maximum daylight to shoot | The longest days of all; near round-the-clock light for dawn and dusk shooting |
| February–March | Best whale activity, fledging chicks, fur seals; receding ice opens new waters | More dramatic, moodier skies; warmer late-season tones and beautiful storm light |
If pristine ice and soft, clean light are your priority, aim for November. If you want bustling colonies, chicks, and the longest possible shooting days, December and January are unbeatable. And if whales and dramatic, atmospheric skies set your heart racing, February and March deliver, with the bonus of receding sea ice opening up channels. There is no single “best” month, only the best month for the images you most want to make.
What an antarctica photography trip costs
Let me be honest and useful about money rather than quoting a single figure, because Antarctica fares swing enormously with cabin category, ship, season, itinerary, and the level of photo instruction, and they change every year. For a full treatment of the numbers, send yourself to our Antarctica trip cost guide, which breaks down every line of the budget. Here, I will give you the structure as it applies specifically to photographers.
As a starting frame of reference, dedicated photography voyages tend to begin somewhere around eight thousand US dollars per person and rise steeply from there with ship class, cabin, and itinerary length. A standard expedition with a photographer aboard at no charge can be a far more economical way in, while a small-group, instructor-led photo expedition on a premium vessel sits at the top of the range. Beyond the headline fare, budget for these photographer-specific extras:
- The voyage fare itself, which is by far the largest number and the one most affected by ship and season. Photo-dedicated departures often carry a modest premium over a comparable standard sailing.
- Flights and a buffer night. Most voyages leave from Ushuaia, Argentina, usually reached via Buenos Aires; I always build in at least one night before embarkation, weather delays are real, and arriving frazzled is no way to start a shooting trip. See our how to get to Antarctica guide for the routing.
- Gear investment. Spare batteries, extra cards, dry bags, a beanbag, lens cloths, and possibly a rental telephoto add up. Factor it in.
- Insurance. Comprehensive travel insurance with emergency medical evacuation is non-negotiable for polar travel and required by most operators; many photographers add separate equipment cover for valuable kit.
- Optional activities and extensions. Sea kayaking offers a magical low, quiet shooting platform; camping, an extension to South Georgia, or days in Buenos Aires all add cost and reward.
One genuine money-saver worth weighing: the value of a free, expert photographer aboard a standard voyage. If your budget is tight, that option delivers much of the creative benefit at a fraction of the premium of a fully dedicated photo expedition. Match the spend to how serious and how solo-minded your photography is.
The truth about drones in Antarctica
I get asked about drones on nearly every trip, and the answer disappoints people, so let me be clear and save you from a costly mistake. Recreational drone use is effectively banned and very heavily restricted in Antarctica under IAATO guidelines. Do not plan your photography around flying one. The rules exist for good reason, drones disturb wildlife, particularly nesting birds and seals, and the environment is fragile and protected. Operators will not allow recreational drone flights from their ships or on landings, and you should not arrive expecting to.
If aerial imagery is central to your vision, the honest workarounds are these: shoot from the ship’s higher decks for elevated perspectives, embrace the genuinely low and intimate angles a Zodiac and shore landings give you, and accept that the magic of Antarctic photography lives at eye level with the ice and the wildlife, not above it. The continent does not need a bird’s-eye view to astonish.
Kayaking, camping, and other shooting opportunities
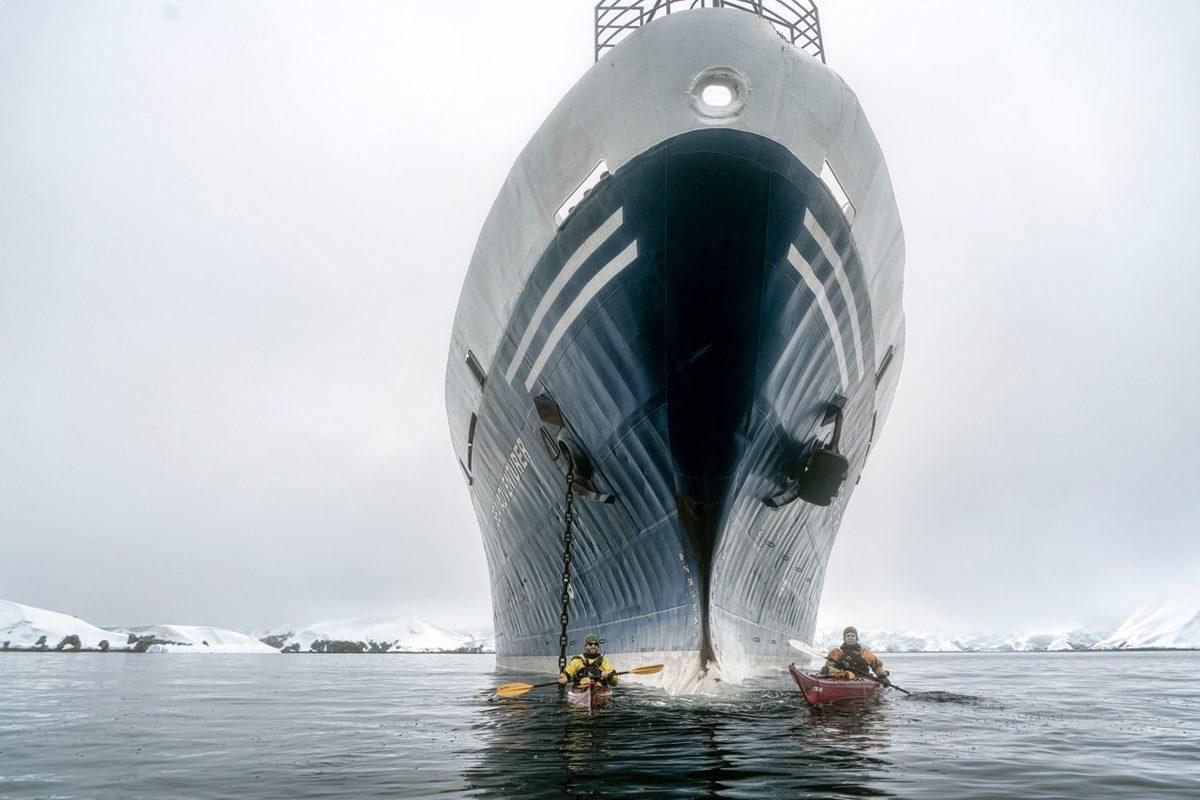
The standard landings and Zodiac cruises are the backbone of your shooting, but a few optional activities open up rare angles, and they are worth considering when you book. Sea kayaking puts you right down at water level, silent and slow, gliding among brash ice with a perspective no motorised boat can match, though you will want to protect your gear carefully on the water. Our guide to kayaking in Antarctica explains how limited those slots can be and how to secure one. Overnight camping on the ice, meanwhile, gives you the surreal half-light of the polar small hours and a stillness that is unforgettable, even if hauling camera gear into a bivvy bag takes planning.
Beyond the obvious wildlife and ice, do not overlook the human and historic subjects: weathered research stations, the historic huts, the orange of a Zodiac against grey water, fellow travellers dwarfed by a glacier for scale. These storytelling frames give your eventual album texture and context. For inspiration on the full range of what you can photograph and do down there, browse our roundup of things to do in Antarctica.
Who an antarctica photography trip suits best
Over many seasons I have sailed with every flavour of photographer, and here is my honest read on who thrives on a dedicated photo voyage.
The committed enthusiast and the professional
If photography is genuinely the reason you are going, and you are comfortable with manual or semi-manual control of your camera, a dedicated program rewards you enormously. The priority access, the instruction, and the time to work a scene are exactly what you need. Intermediate and advanced shooters get the most from instructor-led small-group expeditions.
The keen amateur ready to level up
You do not need to be a professional. Some of the happiest photographers I have travelled with were keen amateurs who used the voyage and its onboard expert to make a genuine leap in skill. If this is you, a standard expedition with a photographer aboard, or an entry-level photo program, is the sweet spot, supportive, sociable, and not intimidating.
The adventurous traveller who happens to love a camera
Plenty of people come for the adventure first and the photography second. If that is you, you may be happiest on a broad expedition with photographic support rather than a hardcore photo voyage that launches at dawn and skips the polar plunge. Our guide to Antarctica adventure travel helps you weigh how much of your trip you want to devote to shooting versus simply experiencing.
Travelling companions and non-shooters
One honest caution: a dedicated photography expedition can be intense, with early starts and a lot of waiting for light. If your partner is not a photographer, a structured photo voyage may test their patience. In that case, a standard cruise with photo support, where you can shoot keenly while they enjoy the broader program, often keeps everyone happy.
My field workflow on a typical shooting day
To make all of this concrete, here is roughly how a strong shooting day unfolds for me aboard a photo-focused voyage.
- Pre-dawn check. I charge and warm batteries overnight, clean my front elements, format cards, and lay out my cold-weather gloves before bed so nothing is rushed.
- First Zodiac out. On a dedicated program, photographers launch early into the soft light and calm wildlife. I keep a wide on one body and a telephoto on another, with a beanbag in the boat.
- Work the light, watch the histogram. I dial in positive exposure compensation for the snow, check the histogram constantly, and shoot RAW bursts of any behaviour.
- Shore landing. I get low, slow down, respect the wildlife distances, and work compositions patiently while the colony goes about its day.
- Warm-up and condensation control. Back aboard, I bag the camera before bringing it into the warm, let it acclimatise, then back up every card to two drives before lunch.
- Midday rest, evening encore. I rest in the flat light, then head out or up on deck again for the long, golden evening light that the polar summer hands us.
That cadence, early light, careful exposure, disciplined backups, and a second session in the evening, is the engine of a productive antarctica photography trip. Build your days around the light and the wildlife’s rhythms, not the clock.
Frequently Asked Questions
Do I need a professional camera for an antarctica photography trip?
No, but you will get the most from a camera that gives you manual control over exposure and a decent zoom range. A weather-sealed body is a real advantage in the spray and snow, and a telephoto for wildlife plus a wide-angle for landscapes is the ideal pairing. That said, plenty of travellers make wonderful images with a capable bridge camera or even a modern phone; the light and the subjects do a lot of the work. The most important upgrades are spare batteries, fast cards, and protection from spray.
What camera gear should I pack for Antarctica?
At minimum: a weather-sealed body (ideally a backup too), a telephoto zoom around 100–400mm or longer for wildlife, a wide-angle for landscapes, far more spare batteries than you think you need (the cold drains them fast, so keep spares warm), plenty of fast memory cards, dry bags and a rain cover for Zodiac spray, a stack of lens cloths, a beanbag or monopod, and gloves you can operate dials in. Our what to pack for Antarctica guide covers the clothing side in full detail.
Can I fly a drone in Antarctica?
Effectively no. Recreational drone use is banned and very heavily restricted under IAATO guidelines, because drones disturb wildlife and the environment is fragile and protected. Operators do not permit recreational drone flights from their ships or on landings. Do not plan your photography around aerial footage; instead, make the most of the dramatic low and eye-level angles that Zodiacs and shore landings provide, and use the ship’s higher decks for elevated views.
When is the best time for an antarctica photography trip?
It depends on what you want to photograph. November offers pristine snow, towering icebergs, and the cleanest soft light. December and January bring peak activity, penguin chicks, bustling colonies, and the longest daylight for dawn and dusk shooting. February and March deliver the best whale activity and moodier, more dramatic skies as the sea ice recedes. There is no single best month, only the best month for the images you most want to make.
How do I expose correctly for all that snow and ice?
The key is to deliberately overexpose relative to what your camera’s meter suggests, because the meter tries to turn bright white snow into mid-grey. Dial in positive exposure compensation, often somewhere around +1 to +2 stops, to keep your whites genuinely white, and check your histogram rather than the rear screen, pushing the data well to the right without clipping the highlights. Shoot in RAW so you can recover highlights, lift shadows, and correct white balance in editing afterwards.
Will there be a photography instructor on board?
Often, yes. Many expedition ships now include a professional photographer on the team at no extra charge to offer informal guidance and lectures. Dedicated photography programs go further, with a structured workshop, image reviews, and frequently priority on the first Zodiacs out, sometimes led by a well-known guest instructor. Confirm the specifics with each operator before booking, including the instructor-to-guest ratio and whether the program is pitched at beginners or advanced shooters.
How do I protect my camera gear from the cold and spray?
Use dry bags for transit and a rain cover while shooting from Zodiacs, since the spray is constant and salty. Keep spare batteries warm in an inside pocket and cycle them as they fade in the cold. Carry plenty of lens cloths for spray, snow, and fog. Crucially, manage condensation: before bringing a cold camera into a warm cabin, seal it in a bag and let it warm gradually to prevent fogging and moisture damage. Reverse the process, acclimatising gear to the cold, on the way out.
Is an antarctica photography trip suitable for beginners?
It can be, depending on the trip you choose. A standard expedition with a photographer aboard is welcoming and supportive for beginners and keen amateurs, letting you learn at your own pace. A dedicated, instructor-led small-group photo expedition, by contrast, is usually pitched at intermediate and advanced shooters and can feel intense, with early starts and long waits for light. Match the program to your level, and be honest about how much of the trip you want to spend behind a camera.
Is photographing the wildlife allowed, and are there rules?
Yes, photographing wildlife is one of the great joys of the trip, but strict guidelines protect the animals. Expedition teams enforce minimum distances, typically around five metres from most wildlife and more for fur seals, and you must never block an animal’s path to or from the sea or approach nesting birds. A telephoto lens lets you fill the frame while keeping a respectful distance. Follow the team’s briefings to the letter; the animals’ welfare always comes before any photograph.
Final thoughts
An antarctica photography trip is, in my biased and entirely sincere opinion, the most rewarding journey a photographer can take. The combination of fearless wildlife, surreal light that lingers for hours, and ice on a scale that defies the frame is simply unmatched, and a dedicated voyage gives you the time, the access, and the expertise to do it justice. Bring the right gear and double your batteries, learn to expose for the snow and live by your histogram, shoot in RAW, get low and patient with the wildlife, forget the drone, and choose your month for the images you most want to make. Do that, and you will come home with frames that stop people in their tracks, and with the memory of a leopard seal holding your gaze that you, unlike me on that first trip, will not have missed. When you are ready to dig deeper, start at our Antarctica for every traveller hub and read our broader Antarctica photography guide before you book.